Showing posts with label Skincare. Show all posts

Sunday, January 26, 2020

The Makeup Eraser

Background

I remember the days when I didn't think double cleansing was necessary.  I always wondered why the girls on YouTube would use something to remove all of their makeup prior to washing their faces.  I thought, what's the point if you're just going to wash your face anyway?  Can't I just remove my eye makeup, then wash my face, and I'll be good to go?  The answer is no... I was not good to go!

If you are like I used to be in this area, let me shed some light on the importance of the double cleanse.  If you use an eye makeup remover but then don't use a makeup remover on your face for your foundation, powder, etc prior to washing your face, you are not getting your skin clean!  All your cleanser is doing is taking off some (probably not all) of your face makeup.  Not only are you not cleaning your face, but most likely, remnants of your face makeup will be left behind to clog your pores and potentially cause acne.  It's like taking a shower with your clothes on.  When you double cleanse... i.e. use something to remove all of your makeup prior to washing your face, you will not only remove all of your makeup, but your cleanser will then be able to go in and actually do what it's supposed to do--clean your skin.  There are products out there claiming to be a one step makeup remover and cleanser, but I don't believe any one product out there can successfully remove your makeup and clean your skin in one step.  If you don't want to buy a separate product to remove your makeup, then at the very least, wash your face with your cleanser twice.  It might seem tedious and unnecessary, but I promise you that it is worth it... and 100% necessary.

For years now, cleanse-off oils have been my favorite method of removing my makeup.  My all-time favorite is this one by Clinique.  You massage it into dry skin, and it dissolves your makeup.  Add water and it emulsifies and rinses clean, then follow with cleanser.  So easy.  Makeup wipes are another quick and easy option, but I try to only use those when I travel.

Enter, Makeup Eraser

The Makeup Eraser has been around for several years now.  I had been tempted to buy it multiple times but never did until a couple months ago.  It retails for $20.  The Makeup Eraser is a very soft cloth that you run under warm water before using it on your face to remove all your makeup.  What convinced me to buy it was this awesome pack I saw at Costco for $20 but was on sale for $15.  For less than the price of one, you get two makeup removing cloths and a headband!  Side note--I love the headband and use it every day when I wash my face.
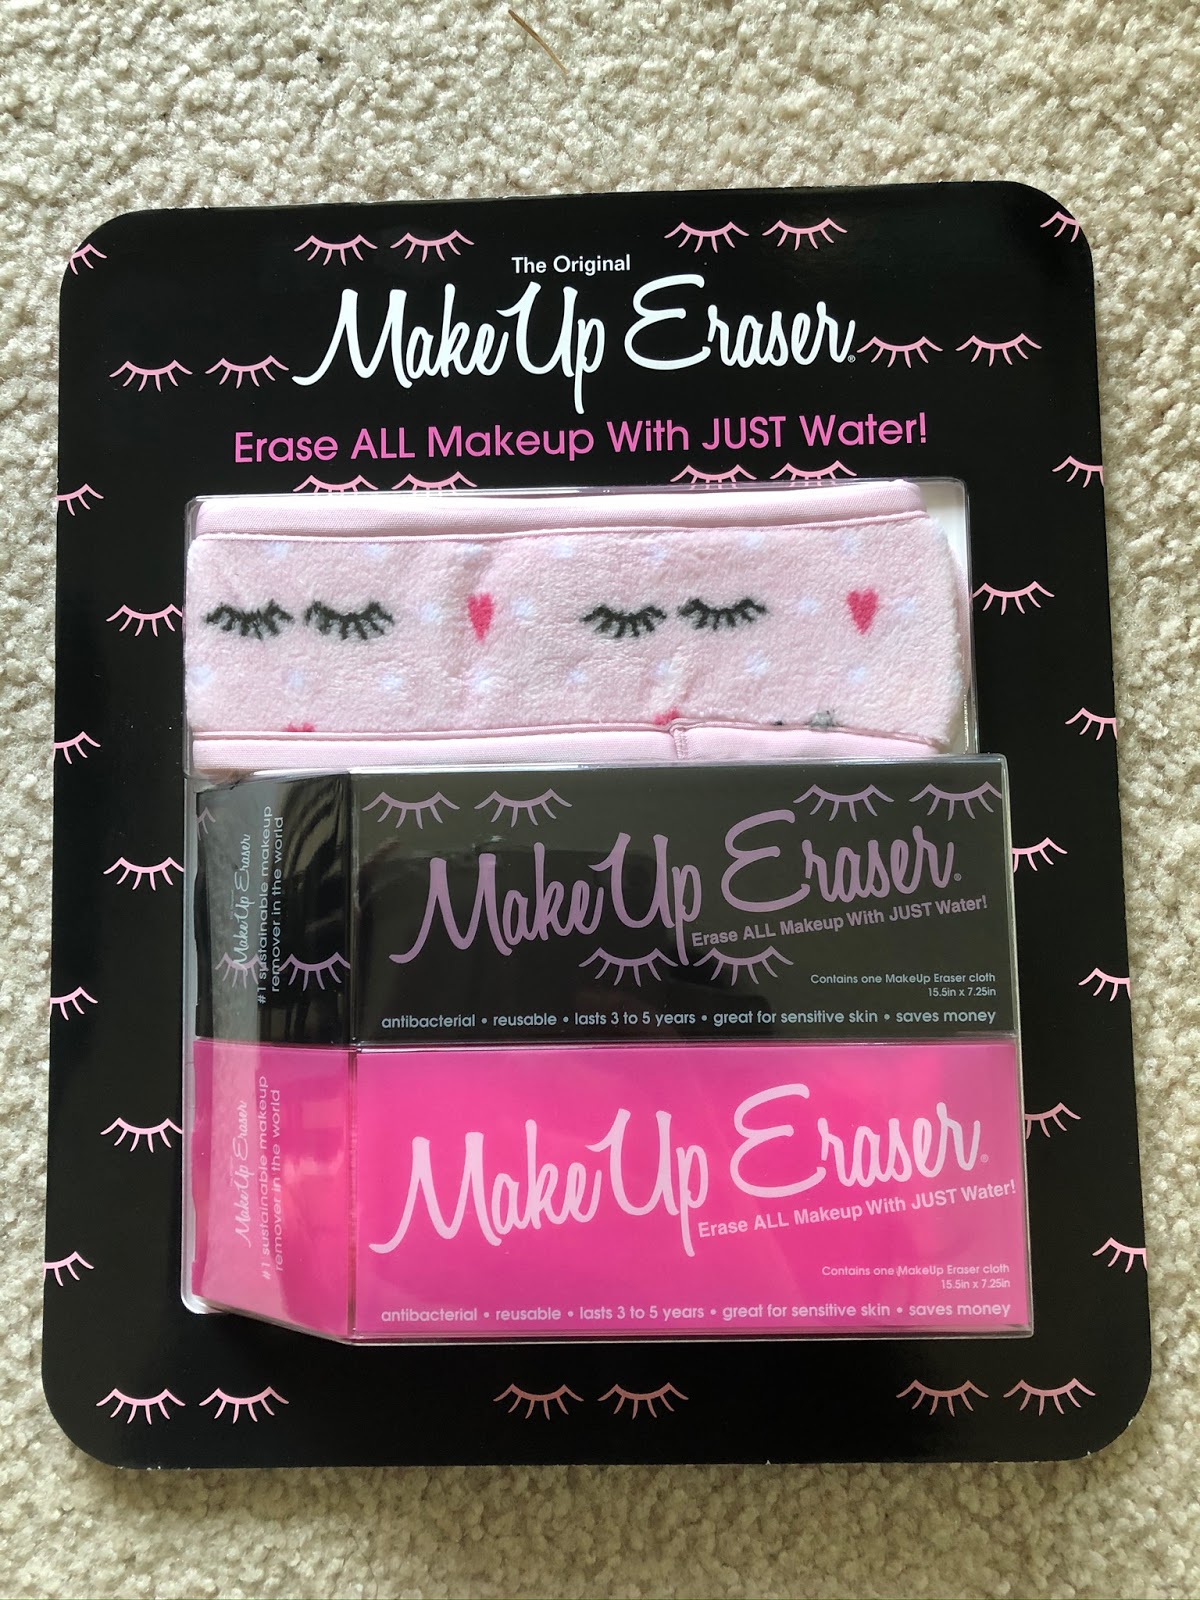
Found at Costco! Top to bottom: headband, pink makeup remover cloth, black makeup remover cloth

Back to the actual Makeup Eraser.  The instructions say to wash and dry it before first use, and it's safe to use fabric softener (just not bleach).  It's also safe to use with dryer sheets.  When you're ready to use it, run it under warm water and wring it out slightly.  Start with the side without the tag and gently use circular motions to remove your makeup.  For removing eye makeup, I use the same method I use with any other makeup removing product--I close my eyes and hold it on top of my eyelids and lashes for about 15-20 seconds with my ring fingers before gently rubbing in circular motions.  This allows some of the mascara/stubborn makeup to dissolve a little bit before you start rubbing so you don't put too much tension on your delicate eye area.  The instructions then say to flip the cloth to the back side, which has longer fibers, and massage it over your face to gently exfoliate.  Amazingly, this cloth works!  It really does take everything off.  A little more effort may be required when wearing heavy eye makeup, but it does work.  I have not tried this with waterproof mascara, but it claims to remove even that.  After use, rinse it, wring it out, and hang to dry.  It can be used for a week before you throw it in the washing machine. 

Tips/Final Thoughts

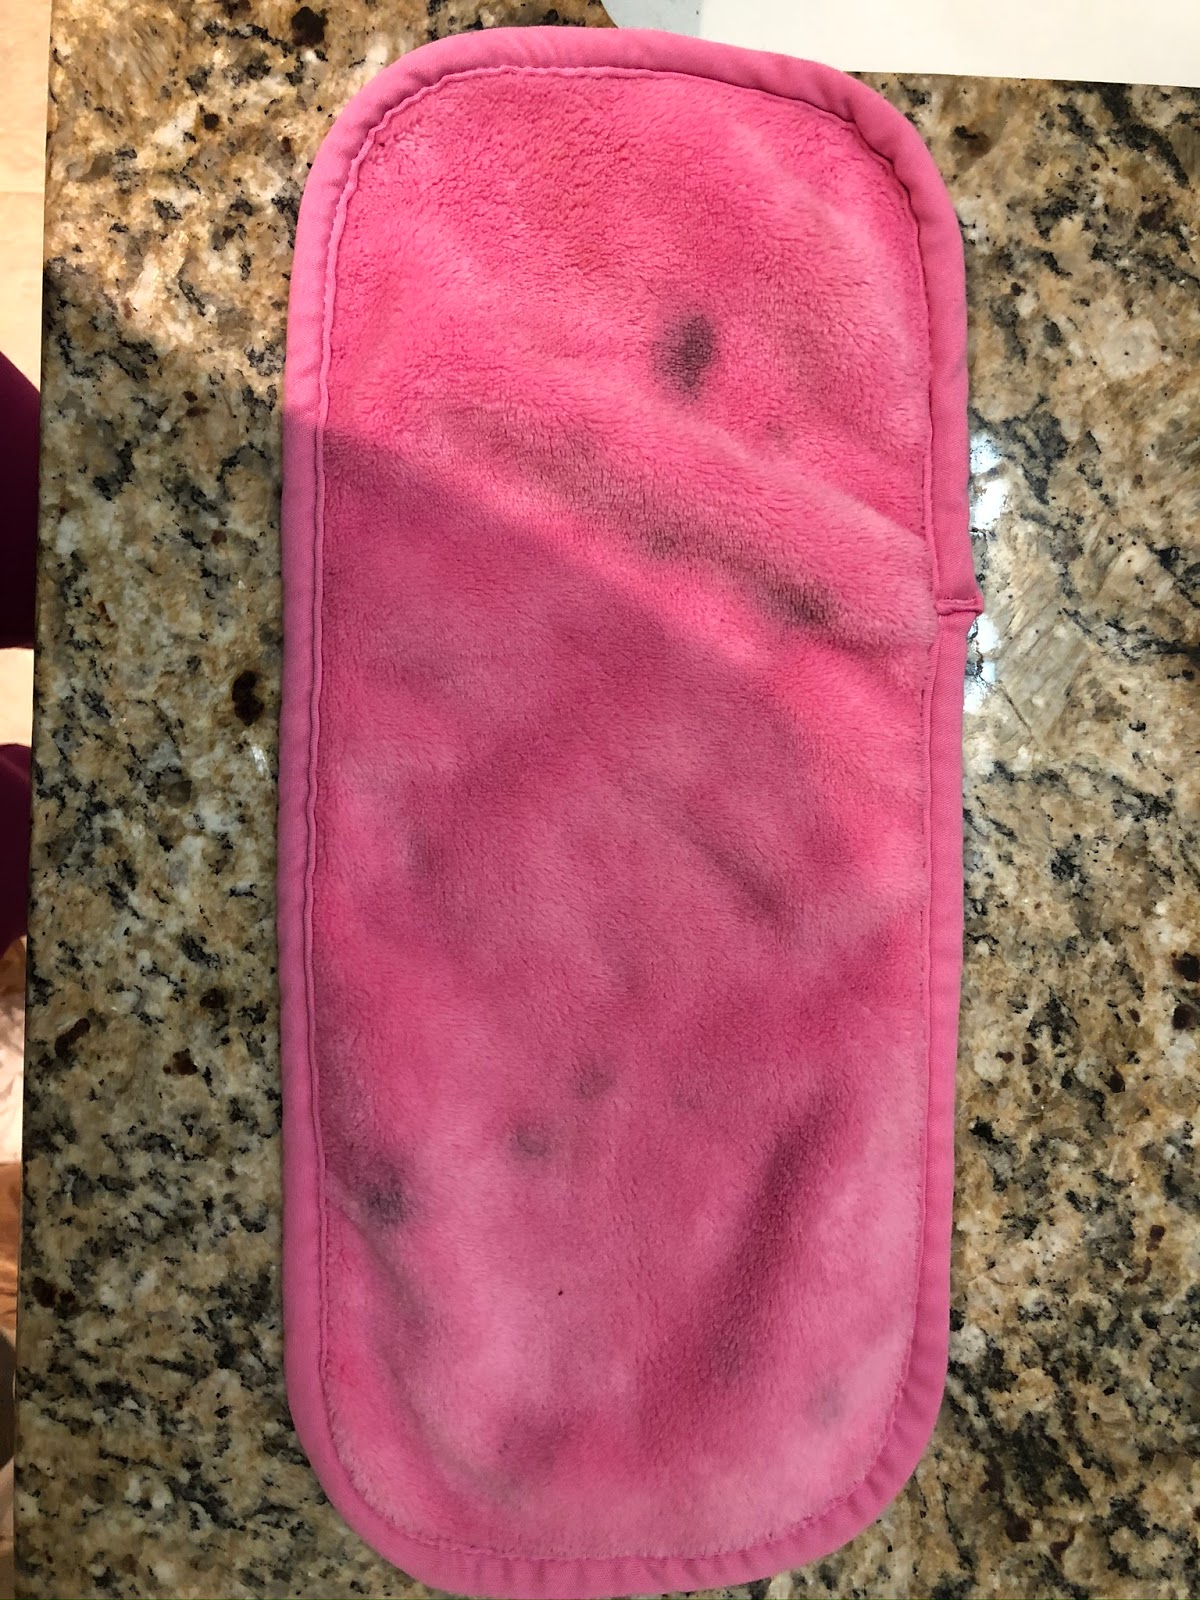
The Makeup Eraser is pretty easy to use, and I find it to be about as fast as using a cleanse-off oil.  It's mess-free and convenient... you only need the cloth and water, and your makeup magically disappears.  I also find that I don't need to wet the entire cloth--I can wet about half of it and use that one night, then wet the other half and use it the next night.  They wash up well in the washing machine.  My pink one left behind a little bit of black from my mascara, but it doesn't bother me because I know it's clean.  The black one is nice because any left behind mascara or eyeliner won't show up. 

After one wash: back side of the cloth washed completely clean

After one wash: front side of the cloth left behind some eye makeup


The cloths are very soft and feel good on your face.  The instructions state that they will perform better with warmer water, and I find this to be accurate.  They also work well when they are more saturated, so after running it under warm water, I wring it out only slightly.

I've read some recent negative reviews about the Makeup Eraser.  Almost all the negative ones say the cloth tugs on the skin too much.  Through trial and error, I've found that tugging can be minimized by keeping it more saturated and wringing it out less, by using hotter water (not scalding, but on the hot side of warm), and by using the method I mentioned for removing eye makeup.  It doesn't matter which type of product you use--if you don't hold it over your eyes for at least 15 seconds, your eye makeup won't have time to lift off of your eye, and more tugging to get the makeup off is almost inevitable.  You really don't need to use too much pressure to get the makeup off your face with this cloth.  If you press too hard, again, tugging is going to inadvertently happen.

If you're interested in trying this out and have a Costco membership, check there before paying full retail.  I like having two to switch out, but one would suffice.

Thank you for reading!  Let me know if you've tried the Makeup Eraser and what you think--just make sure to follow up with your facial cleanser!

xoxo,

 photo a4b29d75-8d29-42de-b0b5-5faa7f59f9d3_zpse4a2d21e.jpg

Thursday, May 4, 2017

Accutane - Is it Worth it? (Guest Post!)

Hope everyone enjoys this post about Accutane from my awesome sister-in-law, Heather!  If you have any questions for Heather, please leave them in the comments below!

XOXO,

 photo a4b29d75-8d29-42de-b0b5-5faa7f59f9d3_zpse4a2d21e.jpg


Accutane - Is it Worth it?

As a teenager and all throughout adulthood, I always had acne breakouts. They were mostly located on my chin and under my nose. When I went to college, I always assumed that acne breakouts were a “teenage” thing and they would eventually go away. But they didn’t.

Fast forward 10 years, and at age 28, I was still dealing with the same breakouts. I felt like I had tried everything - special lotions, face wash, ProActiv, Retin-A -you name it. Everything under the sun that had promised clear skin never worked for me. Like clockwork, every week or so I would find another huge pimple on my chin or under my nose. I always tried to cover these up with concealer, but it always ended up making my face look even more greasy.

In the summer of 2016, I finally decided to see a dermatologist. After hearing about everything I had already tried, my dermatologist recommended Accutane. I felt like I had heard a lot of bad things about Accutane, but he promised me that Accutane would be successful, and he had over 1,000 happy Accutane patients. So I decided to give it a shot.

Accutane is a more serious commitment than any medicine I’ve ever taken. You cannot take Accutane if you are pregnant or trying to become pregnant - it will cause birth defects. As a result, you have to take a pregnancy test 1 month before you start, each month you’re on Accutane, and 1 month after you complete Accutane. You also need to take a monthly blood test, commit to a monthly dermatologist appointment, and fill out an online questionnaire about birth control every 30 days before you are able to refill your next 30 day prescription. I was on Accutane for 5 months, so the entire experience was about 7 months in all.

The number one thing you will experience on Accutane is the DRYNESS. I never imagined my skin could be SO dry. The inside of my nose was so dry, it was constantly clogged with boogers. I quickly learned that applying Aquaphor to the inside of your nose helped alleviate the dryness. My scalp was so dry that I only needed to wash my hair about once every 8-9 days. This was probably the one nice thing about Accutane, because who likes washing their hair everyday anyway? The rest of my skin was dry too - particularly my hands, face, and lips. Having lipstick stay on was a challenge. I developed a couple dry skin patches/rashes on my face and hands which was very unpleasant as well. I wasn’t happy about my skin’s dry appearance, but I was hoping it would be worth it in the end.

However, after about 2 months on Accutane, I noticed that I was no longer experiencing my routine breakouts. The skin on my face was dry and almost scaly, but the pimples were gone! I didn’t want to get my hopes up, and of course completed the 20 week cycle of pills. But when it was over, I still did not have a single pimple. My skin was completely clear for the first time in years - maybe ever. It was an amazing feeling.

I have now been off of Accutane for 4 months. The side effects of the drug linger for about a month, and then your skin returns to normal - except for the breakouts. At 4 months post-Accutane, I still have not had a breakout! I never thought I could actually be free of the constant pimples and redness.

If you feel like you’ve tried everything to clear up your skin, I would highly recommend Accutane. It was definitely a commitment, and the side effects were not always pleasant, but the end result was everything I had hoped for.

Left: One month before starting Accutane
Right: One month after completing Accutane


Tuesday, July 19, 2016

I've Found My HG Lip Balm

Makeup junkies always like to talk about their "holy grail" products.  I try to save this term only for products that really deserve it.  Guys, I've found my lip balm.  I've truly found my holy grail lip balm.  And it's one that's made for men!


This tube of wonderful goodness to which am referring is Jack Black's Intense Therapy Lip Balm SPF 25.  There are five flavors to choose from, and I opted for the original mint and shea butter variety.

The product has a nice thickness to it (think Vaseline but a little thicker), and it's incredibly moisturizing.  Probably my favorite part about this stuff is that it stays on my lips for HOURS.  That never happens--I'm one of those who is compulsively applying lip balm 1000 times per day.  Depending on what you're eating or drinking, it can even withstand that.

The mint flavor is really nice.  It's not too overpowering like some other mint lip products I've tried (some are even so strong they've burned my eyes).  That does not happen with this.  It's also quite a bit thicker than the CO Bigelow Mentha Lip Shine and lasts quite a bit longer on the lips.  It has a nice cooling sensation (again, not overpowering) and feels great.  I also like how it's not TOO glossy.  The finish is almost like a satin-matte with just a little bit of something.  That probably has to do with the fact that this was made for men.  It makes your lips look beautifully healthy.

Long story short, this stuff is amazing.  I would highly recommend that you go pick up a tube immediately.

Thanks for reading!
 photo a4b29d75-8d29-42de-b0b5-5faa7f59f9d3_zpse4a2d21e.jpg

Thursday, June 30, 2016

Favorites: June 2016

Summer is officially here!  As the seasons change, so do my favorite things.  Here's a look into what I've been loving lately.


Skincare
I've been loving Cetaphil's Oil Control Moisturizer SPF 30.  I still get a bit oily after several hours, but it's much less greasy than the CeraVe moisturizer with SPF I had been using previously.  I always have blotting sheets in my purse, so any excess oil is easily taken care of.  It's a bit pricey for drugstore skincare, but it's the best daily moisturizer I've found yet.  And it comes highly recommended by dermatologists.

Makeup
Bare Minerals Original Foundation is the only foundation I've worn all summer.  I have purchased several of these over the last 10 years and have used it on and off.  Every time I start using it again, I forget why I stopped.  It just does something for my skin that no other foundation does.  It's completely undetectable and gives the illusion of "I have perfect skin" rather than "I'm wearing foundation."  I wear the shade Medium Tan.  It feels great on my skin.  It's pretty.  It works.  It also makes me a little bit nostalgic--every time I use it, I think back to my freshman year of college when I first discovered it.  Good times.

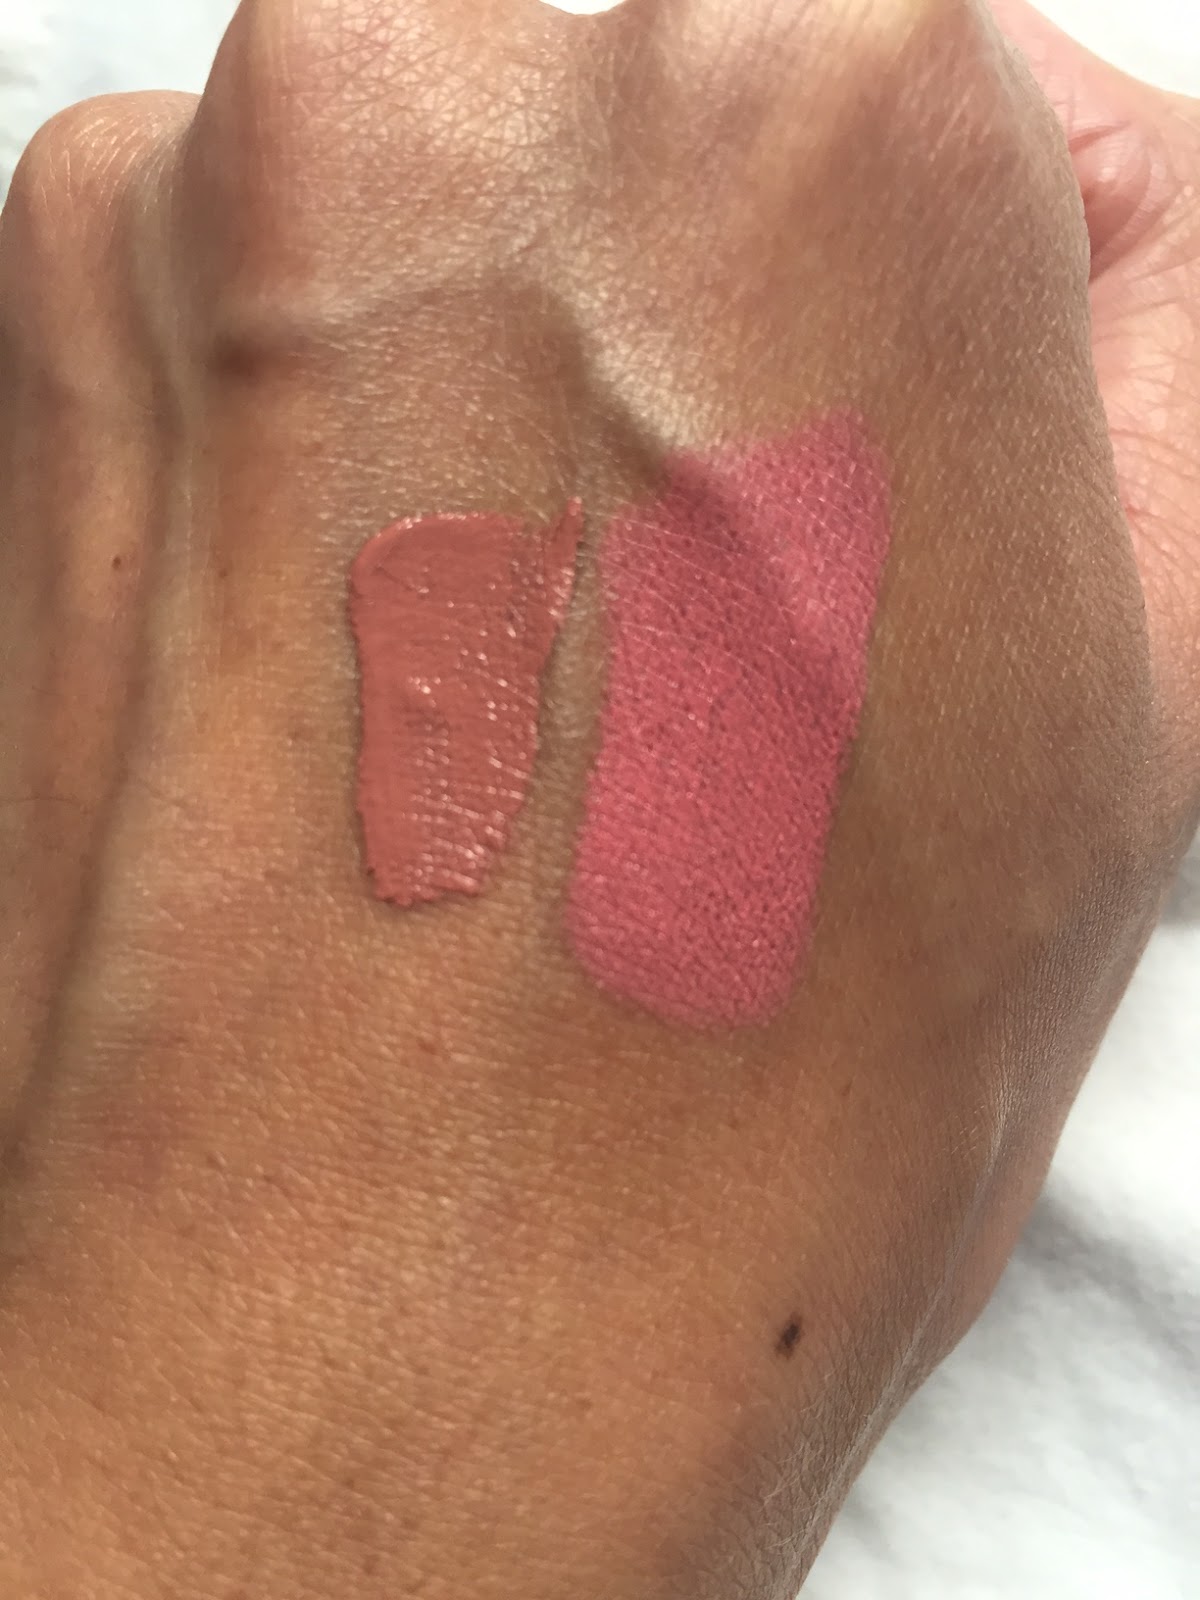
Lipstick-wise, I've been really into MAC's Lipstick in Please Me and Anastasia's Liquid Lipstick in Crush.  We all know that MAC lipsticks are fantastic, Please Me is (in my opinion) the perfect pink.  Crush is the first of Anastasia's liquid lipsticks I've tried, and I'm impressed.  I certainly did not need another pinky nude; however, I didn't have any in my collection that were in liquid format.  The color is beautiful, and it lasts all day through eating and drinking.

Left: ABH Liquid Lipstick in Crush
Right: MAC Lipstick in Please Me

I rediscovered a blush that I hadn't used in a while--ELF's Studio Blush in Pink Passion.  It's one of those blushes that might scare you at first glance, but it's much more wearable than it appears in the pan.  It gives the prettiest, freshest glow.  I wore it on my wedding day, so it is obviously a favorite of mine.  And like all ELF products, it's super affordable!

Perfume
I've found a combination I love--Victoria's Secret Coconut Passion Fragrance Mist combined with Bobbi Brown's Beach Perfume is dynamite.  It takes me to a happy place of being on a beach in Kauai.  I love both of these scents on their own, but they are even more of a delight when mixed together.


What have you been loving this summer?  Thanks so much for reading!

 photo a4b29d75-8d29-42de-b0b5-5faa7f59f9d3_zpse4a2d21e.jpg

Thursday, June 9, 2016

CeraVe Cleansing Cloths: Ultra Gentle??


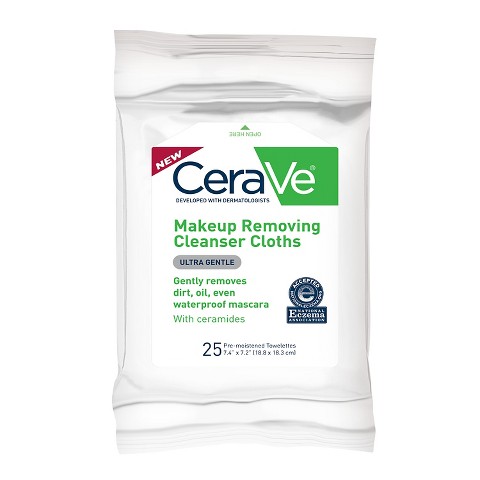
I've been loyal to CeraVe skincare for quite some time.  While I'm not a skincare expert, I do know that many dermatologists like this brand, and I also know that fragrance does not belong in skincare.  It's hard to find makeup removing towelettes that are unscented (the only ones I've found so far are by the brand Simple).  Therefore, I was psyched when I saw these wipes at Target and couldn't wait to try them out.  I figured if they're by CeraVe, they have to be good, right?  Boy, was I wrong.

First of all, I detected a scent right away.  It wasn't the typical floral or fruity smell that wipes usually have.  It smelled like... whiskey.  No joke.  This was an  unwelcome surprise.

Then... I used it on my face.  I've never had a more painful experience with makeup removing wipes.  It appeared to remove my makeup pretty well, but it stung my skin (and my eyes!!).  Since I've been using Differin and Aczone for my acne, I thought maybe it was just that my skin had become more sensitive, and I thought maybe they would be ok to continue using, even if they stung.  A few days later, I used one to remove my liquid lipstick... and it stung my lips!  That has never happened before, and there is no way my lips would be affected by either of my prescription creams.  That was the final straw, and at that point, I rendered these wipes unsuitable for the face.

If you can't tell already, I really regret this purchase.  Not only did they cause pain, but they were expensive--$8 for one pack!  I don't understand how this went so wrong--they are highly rated on beautypedia.com.  Who knows, maybe I got a bad pack, but I'm not willing to spend another $8 to find out.  I would not consider these to be "Extra Gentle" as stated on the packaging.  I'm very sad that these were a total fail for me.  If you are brave enough to try them, I would be interested to hear about your experience.

Thank you for reading!
 photo a4b29d75-8d29-42de-b0b5-5faa7f59f9d3_zpse4a2d21e.jpg

Friday, December 11, 2015

Three Ways I Use Tea Tree Oil

Tea tree oil is something I've had sitting in my medicine cabinet for half a year, but I only started using it regularly about a month ago.  It was one of those products I bought because I had heard it was good for acne then proceeded to forget about it.  I kept seeing the words "tea tree oil" pop up in beauty blogs and on my Pinterest feed.  I think the universe was trying to tell me to start using it, so I did just that!  The one I've been using is by the brand NOW Essential Oils.  I purchased it here for $6.49.  Tea tree oil can be found at health stores, grocery stores, online, and probably other places.  It doesn't matter where you get it or what brand it is as long as it's 100% pure tea tree oil.  There are many uses for this product, which has anti-bacterial, soothing, and healing properties.  It's very potent, and a little drop goes a long way.  You can scour the internet for more information and uses, but here are the three ways I've put it to use.

 As a Toner
I recently posted a skincare routine which featured two toners.  You can find that post here: http://idreamofmakeup.blogspot.com/2015/10/updated-skin-care-routine.html.  I still use these toners, but I've incorporated a homemade concoction into my routine.  Yes, that's three toners.  Yes, that is excessive.  Basically, the only reason I'm still using the two mentioned in my previous post are because I don't want them to go to waste.  But I was dying to try a homemade toner recipe, so I went ahead and made one.  Once I'm out of my other two, I will probably exclusively use this one.

Here's what you need to make your toner:
*An empty bottle or container of some sort (Mine is 6 oz, and I found it in the travel toiletry section of Target.)
*Tea tree oil
*Witch hazel
*Apple cider vinegar (Make sure it's the raw unfiltered kind.  I used this one by Bragg and found it at Target.)

Step 1: Fill up the bottle halfway with witch hazel
Step 2: Add 20 drops of tea tree oil (less if your container is smaller than 6 oz and more if it's bigger)
Step 3: Add a splash of ACV (I did a little less than a quarter of the bottle)
Step 4: Fill the rest of the bottle up with either water or witch hazel (I used water)
Step 5: The tea tree oil will separate and form a layer at the top, so shake it up before each use
Step 6: Pour some onto a cotton pad and apply all over your face once or twice daily

It should look something like this (but the bottle will be full):


ACV has many health benefits and makes your skin look more youthful and glowy.  Combined with the antibacterial elements of the tea tree oil, this toner is gold.  It's all natural, and it's affordable.  It's very soothing, and because it does not contain alcohol like most toners, it's not at all irritating.  I do have to warn you about the smell.  ACV and tea tree oil both have strong scents, and combined, well...it's not the best smelling toner you'll encounter.  It will fade quickly after you apply it on your face though.  I'm really enjoying this toner, and I think my breakouts have decreased somewhat since I've started using it.  It also does give my skin a glowy, healthy appearance, which I'm all about.

As a Spot Treatment for Blemishes
Because tea tree oil is so potent, you never want to use it straight on your skin without first diluting it.  To use as a spot treatment, all I do is wet a q-tip with warm water, then I pour one drop of tea tree oil on it.  One drop is all you need, and the warm water will work to dilute it.  About 20 seconds after I do this, I can feel the tea tree oil going to work.  It feels very soothing, and it speeds up the healing process of the blemish a lot.  It won't be gone by the next morning, but it will look a lot better!  I use this spot treatment right after I wash my face and before I apply my moisturizer twice daily until the spot is gone.

To Heal Canker Sores
Yes, you read that correctly.  This is a weird one that my dentist told me about.  I follow the same procedure as the spot treatment above.  Before applying it, you'll want to dry the sore out a little bit so the tea tree oil will stick.  I use the dry end of my q-tip to dry the sore out before applying the tea tree oil.  I notice an immediate stinging feeling that quickly turns to a soothing feeling.  While it doesn't numb the canker sores as well as Kank-A, Anbesol, or other numbing agents, it does provide a little relief .  I like to use this in conjunction with Kank-A because the Kank-A numbs sores, but the tea tree oil actually helps to heal them.  I had a couple monster ones last month that were extremely painful.  Using tea tree oil on them a couple times a day expedited the healing process, so I was only in agonizing pain for a few days instead of a week as would normally be the case.  Tea tree oil doesn't taste very good, but the taste doesn't last long.

I hope this post was helpful and that it inspires you to explore the wonderful benefits that tea tree oil has to offer!


 photo a4b29d75-8d29-42de-b0b5-5faa7f59f9d3_zpse4a2d21e.jpg

Wednesday, November 25, 2015

In-Shower/Wet Skin Moisturizers

In-shower moisturizers were all the rave earlier this year.  I was so excited when they came out--it reminded me of one I had from Bath and Body Works over 10 years ago.  I don't even know remember what they were called, and they don't make them anymore, but thinking about them makes me nostalgic for high school.  Anyway, the concept of an in-shower moisturizer is to use it as your last step in the shower.  You put it on and rinse it off, much like you use a conditioner on your hair.  They are supposed to give enough moisture to your skin that you can skip lotion.  I tried two, both of which I will discuss below.

Just recently, the wet skin moisturizers made it into the spotlight.  The idea here is is to use it after you shower but before you dry off.  Like the in-shower moisturizers, this product is meant to replace lotion.  I have tried one variety and will review it in this post.

Nivea In-Shower Body Lotion


Nivea makes four varieties: hydrating, nourishing, smoothing, and cocoa butter.  I have only tried the nourishing one, which is meant for very dry skin.  In-shower moisturizers take some getting used to, as it is a new concept for most of us and leaves a film on the skin.  This one was semi-moisturizing, but if you have dry skin and live in a dry climate like I do, it won't be nearly enough (even though this is marketed towards very dry skin).  It had a nice, light floral scent and a consistency similar to a hair conditioner.  The instructions advise you to not put this on the bottom of your feet, and you do have to be very careful because it makes your tub slippery.  All in all, this one was ok.  I'd say it was my least favorite of everything in this post.  Since I've only tried one variety, I would consider trying the others sometime to see if I like them any better.  I found mine for $5.99 at Target, and you get 13.5 oz.

Aveeno Skin Relief Shower & Bath Oil


This is a product that has been around for a while and can be used either as an in-shower moisturizer or as a bath oil.  This product does not come in different scents or types.  The instructions advise you to shake it up before use.  As inferred from the name of the product, it has the consistency of an oil rather than a conditioner.  I found this one to be more moisturizing and better smelling than the Nivea lotion; it has a light almond scent.  Just like with the Nivea product, I never put this on the bottom of my feet, and I had to be careful to not slip in the tub.  I would recommend this oil over the nourishing variety of the Nivea In-Shower Body Lotion, and I would repurchase this.  I found mine for $7.79 at Bed, Bath, and Beyond, and you get 10 oz.

Jergens Wet Skin Moisturizer


I saved the best for last--this is the product I'm currently using and is my favorite product of the three!  Jergens makes three varieties: refreshing coconut oil, calming green tea oil, and nourishing monoi oil.  The one I have (and the only one I've tried) is the coconut oil.  It doesn't really smell like coconut oil to me, but the scent is really nice and fresh.  It has a lotion/conditioner-like consistency.  Since you don't rinse this off, it doesn't make your bathtub slippery.  I have never put this on the bottom of my feet, but I think you could if you put socks on immediately after drying off.  After you apply it and pat dry, it feels a little oily but not bad.  The oily feeling gradually goes away throughout the day as the product absorbs into your skin.  I would recommend letting this absorb for about half an hour before putting on skinny jeans.  I find it to be more moisturizing than either of the in-shower moisturizers I tried.  I like this product a lot and really don't have anything bad to say about it!  I found mine for $6.99 at Target for 10 oz.

Overall, I like the idea of both of these types of products, but I think wet skin moisturizers are more effective and faster since you don't have to rinse them off.  You can use the wet skin moisturizer technique with baby oil, which I've tried before.  It works really well and leaves your skin very moisturized, but it does also leave it very oily.  It would be pretty hard to put on skinny jeans or leggings over baby oil.  The Jergens Wet Skin Moisturizer is the perfect alternative because it's not as oily.  If you've tried any of these products (particularly any of the other varieties of the Nivea and Jergens), I'd be interested to hear your thoughts.  

Thank you for reading, and I hope everyone has a wonderful Thanksgiving filled with love, laughter, and lots of turkey!  I have so much to be thankful for, including each and every one of you!!  I appreciate the fact that you take any time out of your day to read what I have to say more than you know.

Much love to all,
 photo a4b29d75-8d29-42de-b0b5-5faa7f59f9d3_zpse4a2d21e.jpg

Friday, October 16, 2015

Updated Skin Care Routine

Hello everyone!  I'm here today with an updated skin care routine.  I am one who takes skin care very seriously and am diligent about keeping my skin in good shape.  This might seem like a lot, but I try to keep it as simple as I can, and I think it's possible to find good skin care at good prices.  Keep in mind, though, that even among people with similar skin types, everyone has different needs.  This is the routine that has been working for me (I have pretty normal skin) over the last year or so, and I hope it will be helpful to you in some way, shape, or form.

Morning Routine
*I use the CeraVe Hydrating Cleanser with my fingers to wash my face.  This is a gentle cleanser that is great for sensitive skin.  Since I'm not having to wash off makeup in the morning, I don't need a harsh or serious cleanser.  This stuff is great for gently cleaning my skin and making it soft and smooth to prime for makeup application.
*I then spray about three spritzes of the Murad Hydrating Toner on my face and let it dry as I brush my teeth.  This toner smells like peaches and doesn't dry my skin out.
*If I have any blemishes, I'll spot treat with Clean & Clear Persa-Gel 10.
*Next is eye cream.  My favorite for daytime use is the Origins GinZing Refreshing Eye Cream.  It has a nice cooling feel and a pink tint to help brighten.  It leaves a smooth surface to apply concealer over.
*Last is moisturizer.  This varies, but it's always something with SPF.  Depending on what I'm doing that day, I will either use CeraVe Facial Moisturizing Lotion AM (stay away from this if you are oily), Garnier Ultra Lift Transformer, or It Cosmetics CC Cream.  The Garnier and It Cosmetics products work as a moisturizer and base in one for me.  The difference is that the Garnier cream is more of a moisturizer with a slight tint that works to brighten up my skin (very light if really any coverage), whereas the It Cosmetics cream is more like a full on moisturizer and foundation blended together with medium to full coverage.  All three of these moisturizers work well for me.

Evening Routine
*The first step is removing makeup.  This is important!!  If you don't remove your makeup before you wash your face at night, you're never really going to clean your skin--all you're doing is removing some of your foundation.  My favorite makeup removing product is the Clinique Take The Day Off Cleansing Balm.  It works really well at removing both eye and face makeup.
*I then wash my face with the CeraVe Foaming Facial Cleanser.  This is still gentle but cleanses a little better than the other CeraVe cleanser I use in the morning.  At night, I use my Clarisonic Mia 2 with this cleanser.  I know it's expensive, but I've had this for about two years now and have seen a huge difference in my skin since I started using it.  It works to lightly exfoliate, and it really cleans your skin a lot better than just your fingers would do.
*Next, I go over my face and neck with Up & Up Deep Cleaning Pore Treatment as an additional measure to make sure every last trace of makeup is gone from my face.
*About every other to every three nights, I go over my entire face with the First Aid Beauty Facial Radiance Pads.  They exfoliate and brighten your skin, and they also work very well to fade hyper pigmentation/dark spots from blemishes.  They are a bit pricey, so I like to cut them in half to double the uses I get out of them.  Note: If I have dark spots I'm trying to get rid of, I will use a half pad just on the spots every night.
*Eye cream is next.  I like the Roc Eye Cream.  It's moisturizing but not too greasy, so you can use this in the morning under concealer as well.  When I travel and don't want to bring two separate eye creams, I just take this one.
*Moisturizer is last.  In the summer, I use the Neutrogena Oil-Free Sensitive Skin Moisturizer.  In the winter when my skin is drier, I prefer the Clinique Dramatically Different Moisturizer for more hydration.  Don't forget to put both morning and evening moisturizer on your neck!

As always, thank you for reading!  Please feel free to share any of your skin care tips or favorite products with me!
 photo a4b29d75-8d29-42de-b0b5-5faa7f59f9d3_zpse4a2d21e.jpg

Sunday, December 29, 2013

Acne at 25

Yup, you read it right.  I'm 25 years old, and I still have acne.  I know that I am not alone and that many other adults still suffer from it as well.  As I explained in my last post, I've been inundated with breakouts in the last couple months.  I finally decided to switch up my skin care routine (obviously, what I was doing before wasn't working for me).  I wanted to share what I've been using and doing to clear up my face.  It has been working for me, and though my skin still isn't perfectly clear, I've seen a drastic improvement in the last month.  I'd also like to preface this post by letting you know that this is just what has been working for me, and I can't guarantee that it will work for you.  We are all unique with our skin, and my needs aren't necessarily the same as yours (even if we have a similar skin type).  If you are completely unsure about what to use on your skin, please see your dermatologist!

So, without further ado, let's get into my new skin care routine!

The Products:


 The two most common active ingredients used for fighting acne are salicylic acid and benzoyl peroxixde.  In my research, I found that benzoyl peroxide is stronger but can leave behind more discoloration from blemishes.  Since I have dark skin, and post-blemish marks are a problem for me, I opted for a mostly salicylic acid routine (all of the products I mention are from the drugstore). 

I've been using Clean and Clear Daily Soothing Acne Cleanser.  Not all salicylic acid cleansers are created equally--they vary from about .5% to 2% in strength (at least the over the counter ones do--prescription products may be stronger).  I opted for this product because it's 2% but claims to be gentle on the skin.  I like that it's a foaming cleanser, and I started out by using it morning and night.  I have since cut back to only using it at night, and I use a gentle cleanser with no acne fighting ingredients from Aveeno in the mornings.


After cleansing my face, I use this toner by Equate (the Wal-Mart version of the Clean and Clear Essentials Deep Cleaning Toner for Sensitive Skin).  They have two variations--one with 2% and one with .5% salicylic acid.  This is the .5% for sensitive skin, and I got this one because with all the products I'm using, I didn't want to over-dry my skin.  I use it morning and night.


I let the toner dry, then apply my eye cream as usual.  The next step is moisturizer, and I've been using this one with .5% salicylic acid (the Target brand of the Clean and Clear Essentials Dual Action Moisturizer).


 The final step is one I only use at night to spot-treat blemishes after I give my moisturizer a few minutes to sink in.  It's the Clean and Clear Persa-Gel 10 Acne Medication


 Results and Final Thoughts:
I've only been using these products for one month, and my skin has definitely improved.  After about a week, my skin felt more dry, and I also noticed flaking.  I expected this to happen, as the salicylic acid helps skin cell turnover (the flaking comes from the ingredient working to slough off dead skin cells).  This makes it an effective acne treatment because you won't have as many dead skin cells clogging your pores.  However, you still need to exfoliate.  Twice/week, I swap out the Clean and Clear cleanser for a gentle exfoliant at night (I use the Aveeno Positively Radiant Daily Scrub).

If you already have drier skin, I would recommend only using all these products once/day.  You may also want to add something more moisturizing on top of the salicylic acid moisturizer.  Also, if you're going to be out in the sun, make sure you use sunscreen on your face.  I haven't been, but come summer, I'll be using a sunscreen over the moisturizer

The fact that I've also not been wearing makeup as often is worth mentioning.  I have basically stopped wearing liquid foundation (something I used to wear daily) except for special occasions or if I want my skin to look especially flawless.  Instead, I've been going with a naked face whenever I can to let my skin breathe (which is hard when you want to cover up your acne!).  When I still want some color on my face, I use a BB cream or a primer with light powder foundation over it (I recently re-discovered an old love, the Bare Minerals SPF 15 Foundation).  I like this product because it makes your skin look healthy and provides coverage--plus, it doesn't have all the heavy ingredients my liquid foundations have.  I plan on continuing with this routine and going light-handed with products on my face, and with any hope, I'll have clear skin one day!  To any of you out there going through the same thing, I hope this was helpful.  Thanks so much for reading!

xoxo,

CC

Monday, October 7, 2013

Natural Eye Makeup Remover: Coconut Oil

Recently, I revisited something from which I took a long hiatus: waterproof mascara.  I used to wear waterproof mascara every day.  My lashes are naturally long but very straight, and I found that waterproof mascara did better than normal mascara at holding my curl and making my lashes look amazing all day.  Along with rediscovering my mascara love, I also rediscovered how difficult it is to remove, which is pretty much why I stopped wearing it for so long in the first place.  I did some research and found an interesting solution: coconut oil.

I found my coconut oil at King Soopers for a little under $8.  There were two varieties--extra virgin and regular.  I don't know if one is better than the other, but I opted for the regular one, which was also $2 cheaper. 

 It was more expensive than my eye makeup remover for normal mascara-- Equate Oil-Free Eye Makeup Remover (Walmart version of the Neutrogena kind), but I figured it would last forever and that if it didn't work, I could use it for cooking.

One thing you'll notice about this oil is that it's solid at room temperature.  I expected it to have a strong coconut scent, but it really didn't smell like anything.  When I first opened it, it was completely solid with absolutely no liquid in sight.  The directions on the back of the jar say to run the jar under warm water to liquify the product if you're using it for hair or body care.  I didn't run it under water but noticed that the second time I opened the jar (which was right before I used it to remove my eye makeup), a tiny bit of the product on top had melted and turned to liquid. 


I removed my contact lenses prior to attempting to remove my waterproof mascara with this stuff.  I then dipped both of my ring fingers into the product (the more liquidy part, although if yours is solid, the warmth of your fingers should melt it).  I closed my eyes and used my ring fingers to gently rub my eyes in circular motions (the skin around your eyes is very delicate--be careful not to rub too hard!).  Within about 10 seconds, the oil started to break down my eye makeup, and there was soon a large ring of black residue around my eyes.  It was working!  I did open my eyes to check this out, and I didn't experience any stinging or irritation (and I do have sensitive eyes).  I then kept gently rubbing until I felt like most of the eye makeup was removed, then I wiped off the residue with my makeup removing towelettes (I use the Neutrogena Makeup Removing Towelettes). For regular mascara, this is all it should take to completely remove it.  I was testing it with waterproof mascara and noticed that most but not all of my mascara had been removed.  I dipped back into the oil and repeated the process again, and my makeup was completely gone!  I followed up by using the clean part of the makeup wipe to remove my face makeup then by washing my face and doing the rest of the steps in my nighttime skincare routine. 

I was happy with how well this worked.  Even though you may have to repeat the process an extra time for waterproof mascara, it's still faster than it would be with an eye makeup remover.  I felt like it also moisturized the area around my eyes, and it definitely made my lashes look super healthy and conditioned.  I loved the fact that it was so gentle on my eyes--in fact, it's the only eye makeup remover I've ever tried that doesn't sting them at all.  Another benefit is that it's a natural product, and you can use it for different things.  Though I've only used it for removing makeup, I've read that you can use it in your hair as a leave-in conditioner, as a shaving cream, or even as a cheek highlight.  You could probably also use it to moisturize your lips and dry cuticles.

All in all, I give this natural makeup remover two thumbs up!  I think I'll continue to use it on a daily basis, even when I'm wearing non-waterproof mascara.  If you try this, let me know how it goes!